Here are some tips for using a green screen cyclorama Studio:
- Lighting: Good lighting is critical when using a green screen. Ensure that the lighting is even across the green screen to avoid any harsh shadows or reflections. Use a light meter to ensure consistent lighting levels across the entire surface of the green screen.
- Positioning: Position your subject a few feet away from the green screen to avoid any shadows or reflections. This will help you achieve a clean and even key. Make sure that your subject is not wearing any green clothing or accessories that may blend in with the background.
- Color spill: Color spill is the unwanted reflection of the green screen on the subject being filmed. To avoid color spill, make sure that the green screen is evenly lit and that there are no shadows or reflections on it. Also, avoid wearing shiny or reflective clothing, as this can cause unwanted reflections on the green screen.
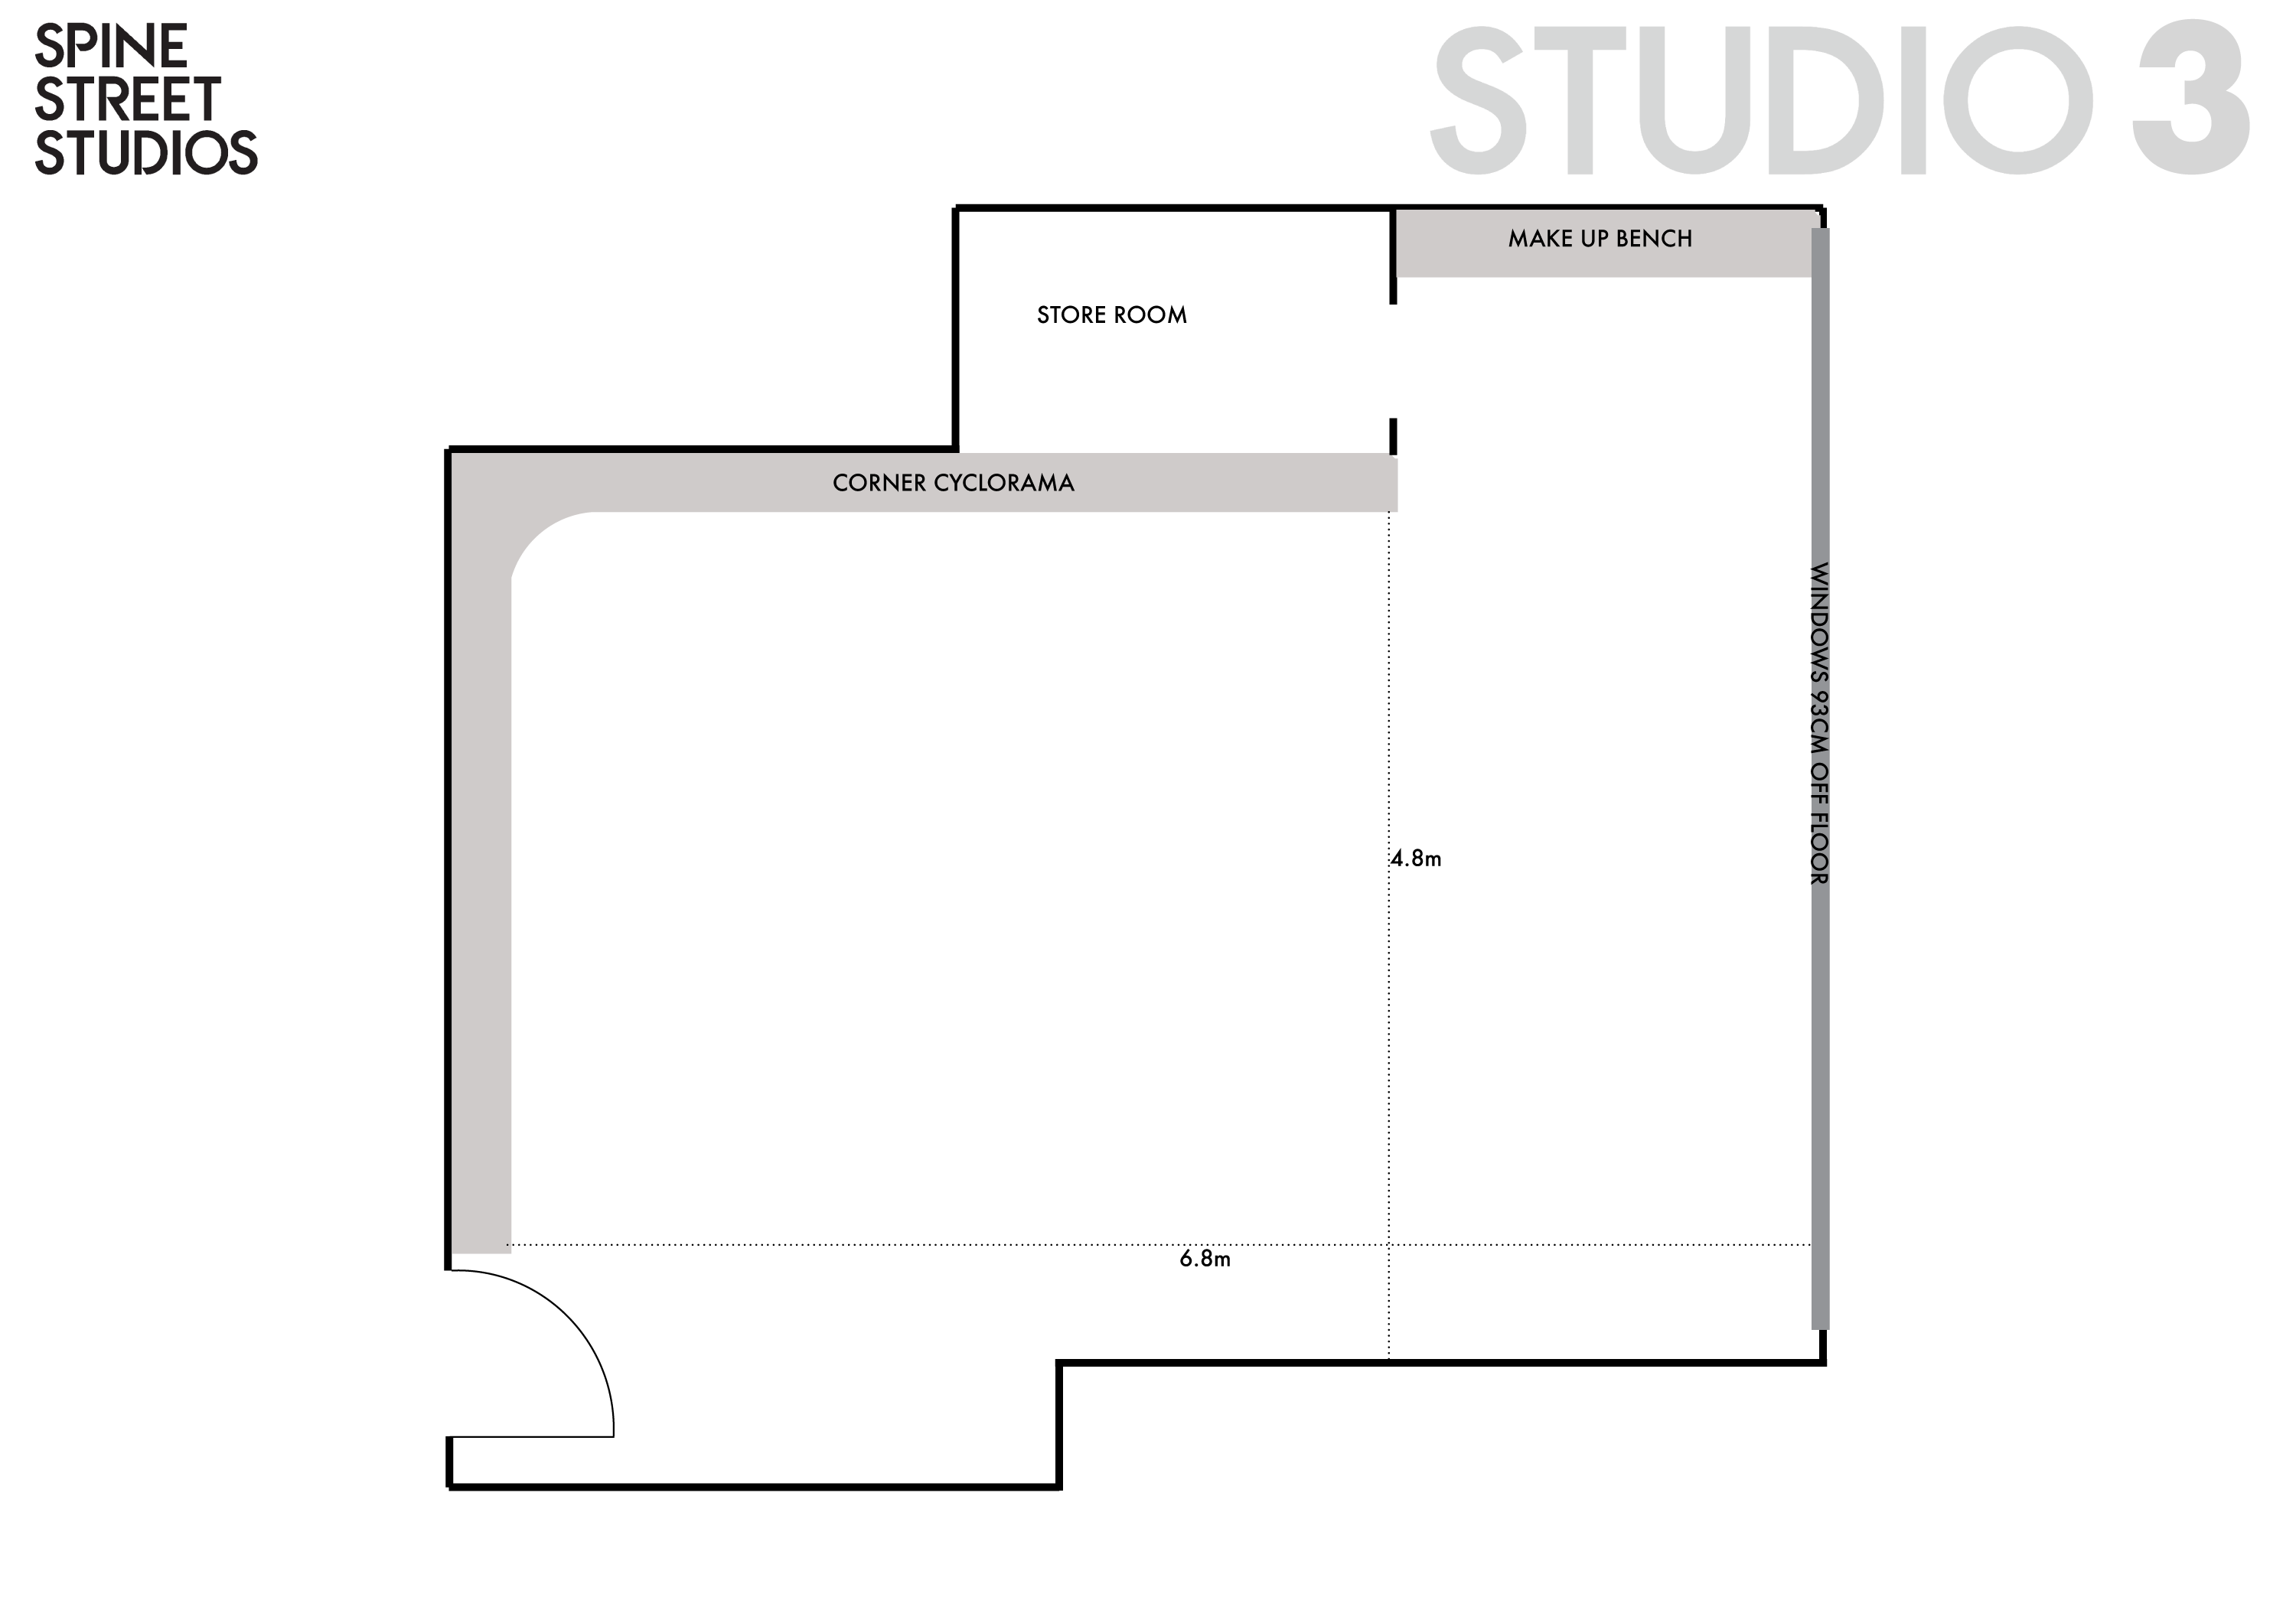
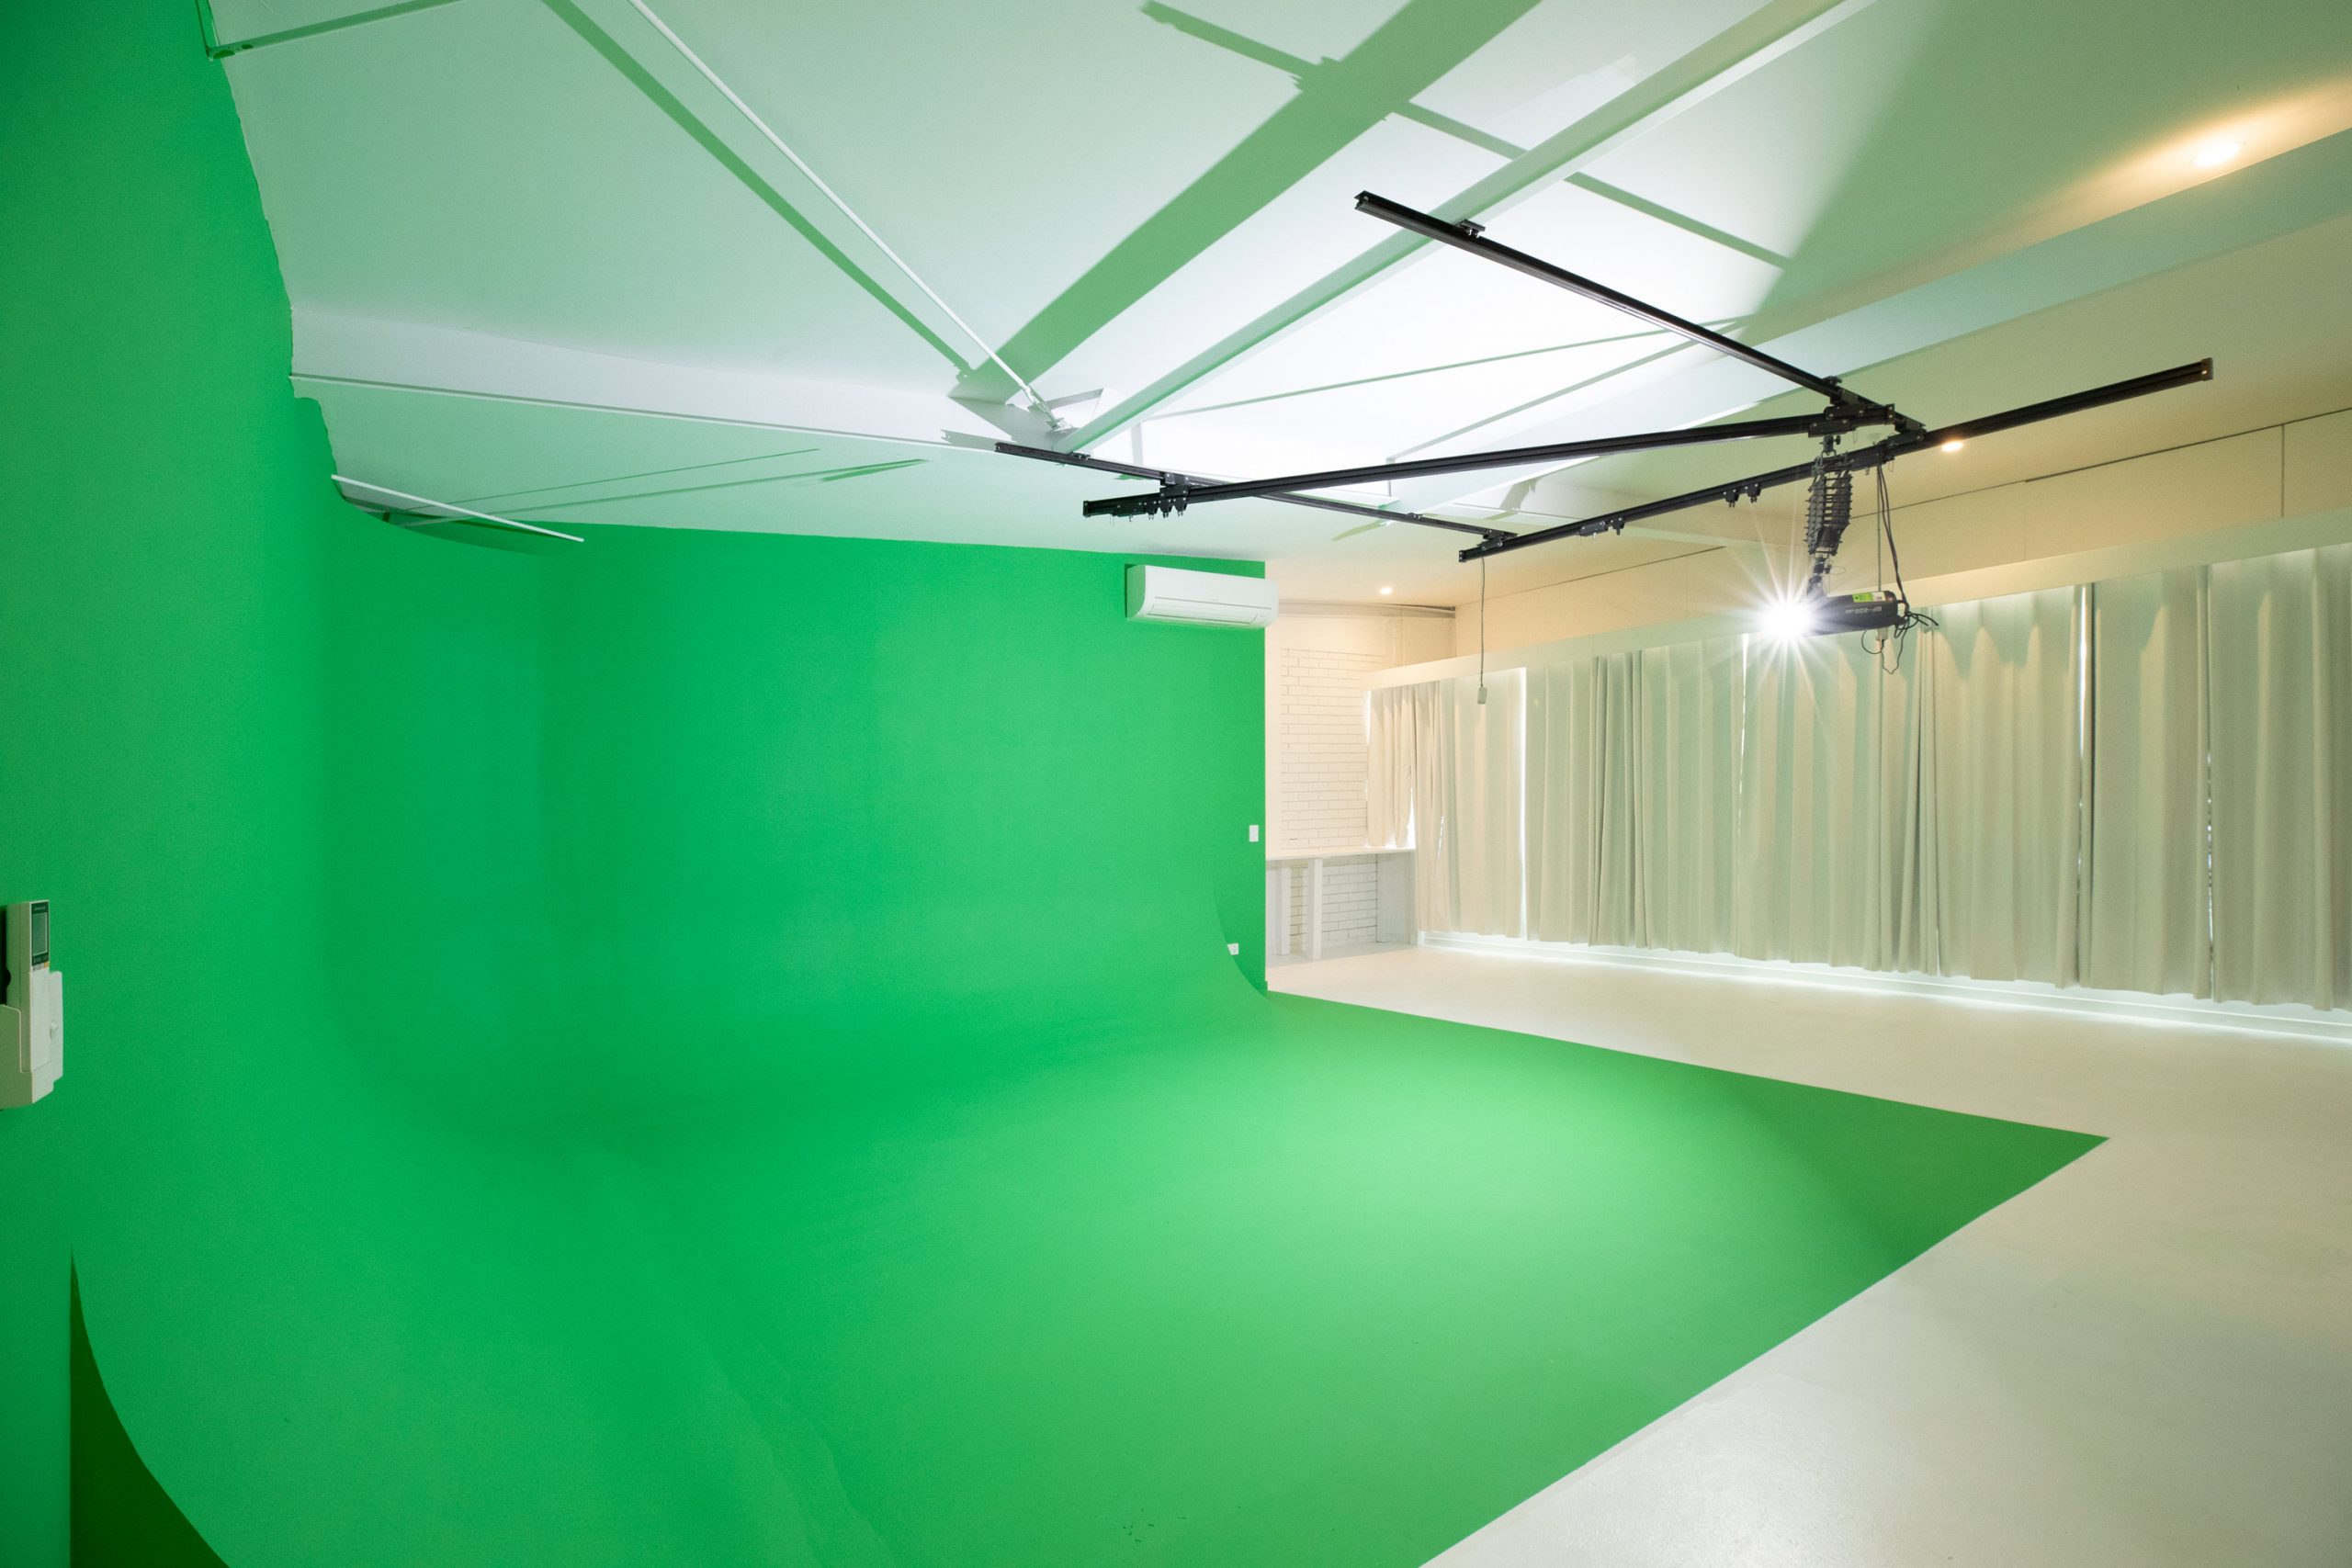
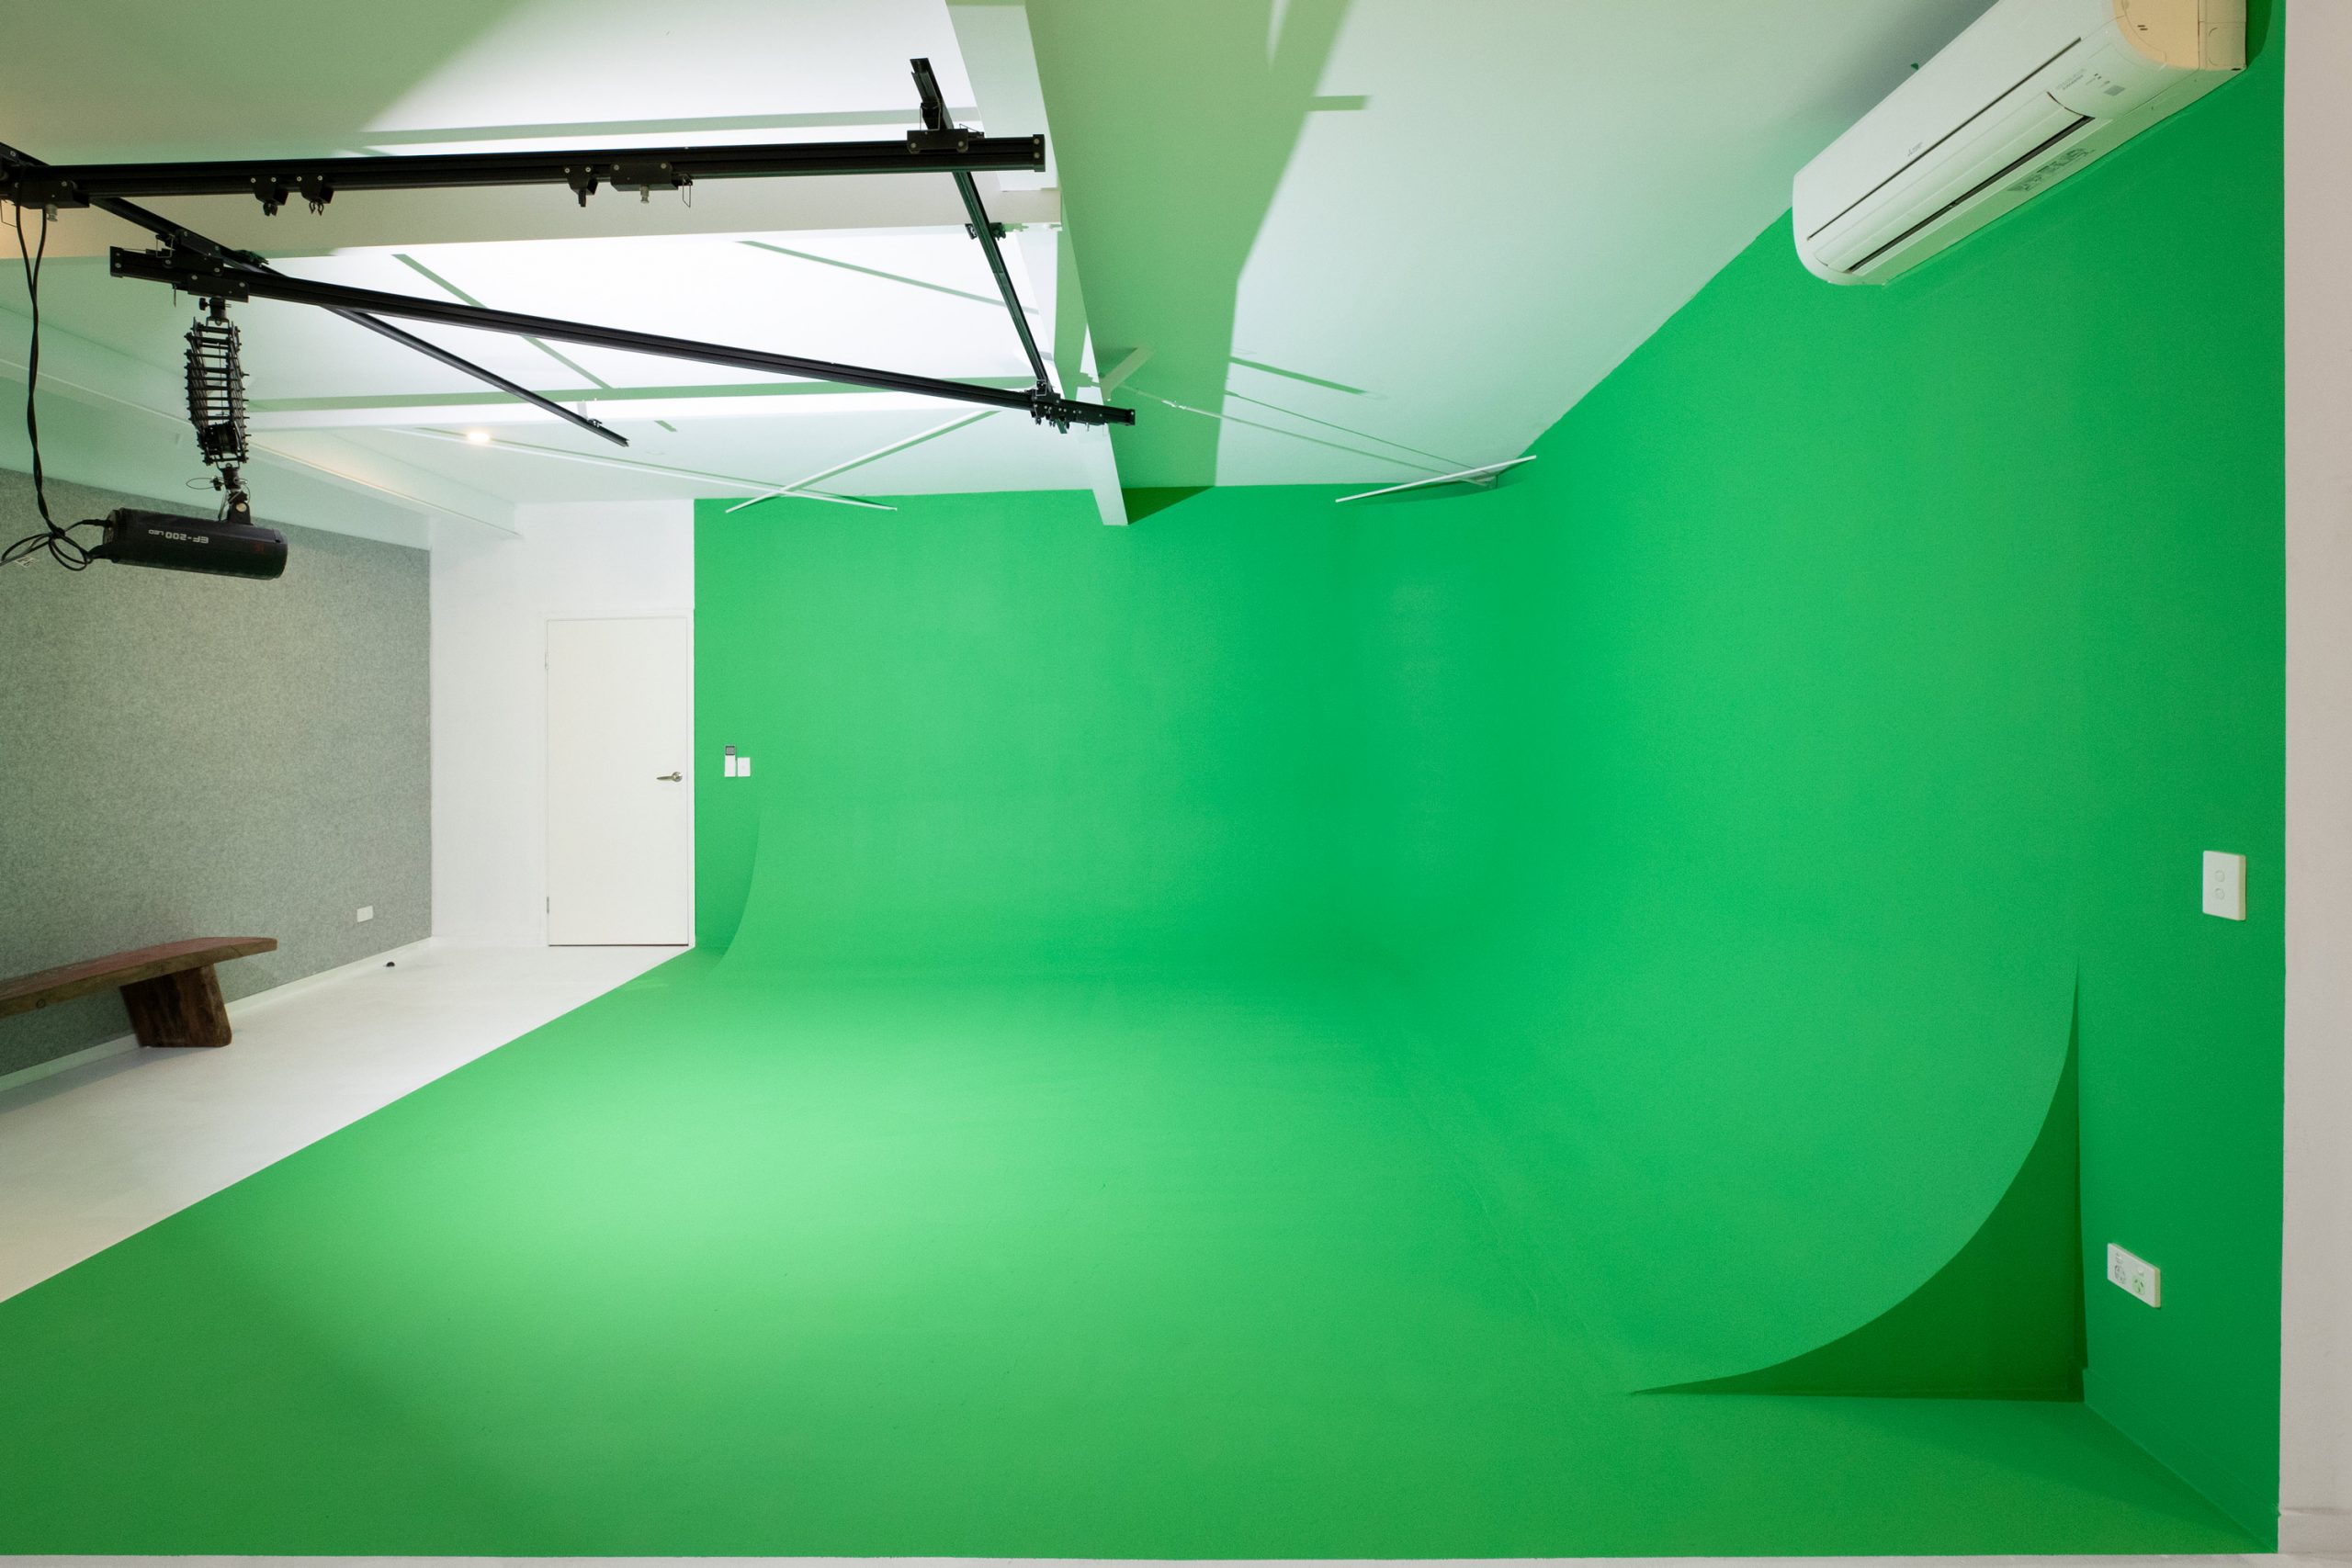
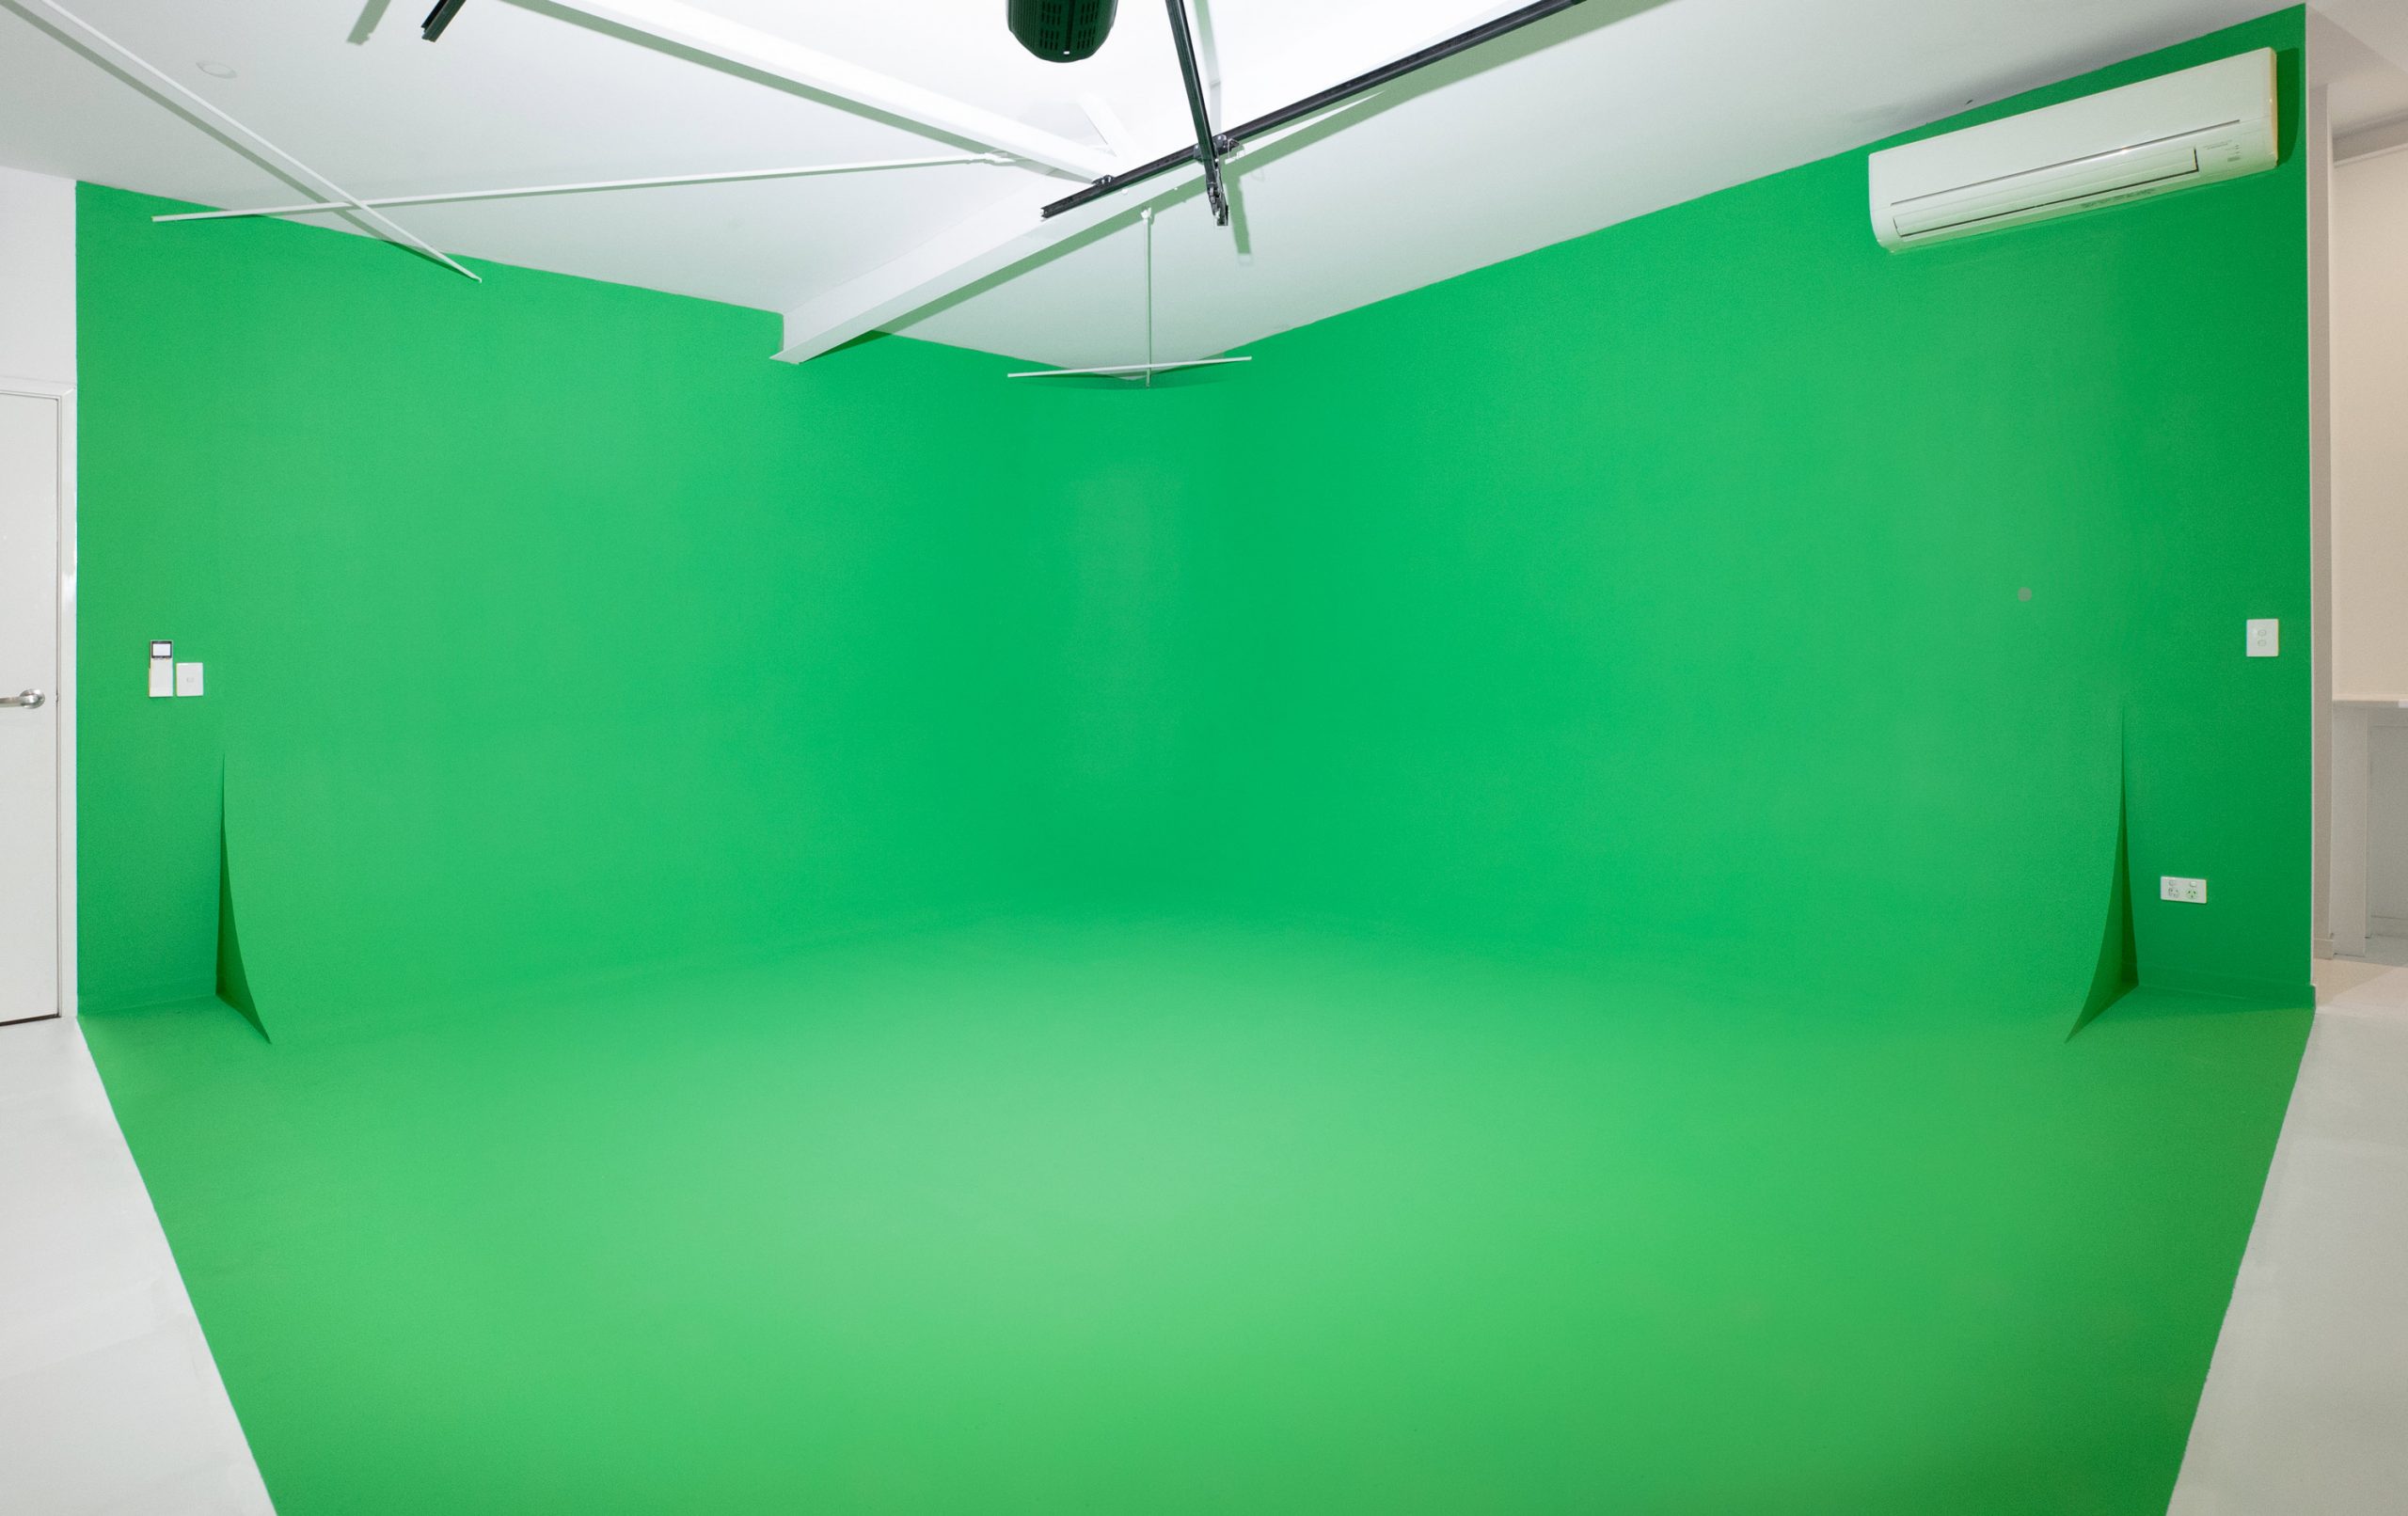
- Quality of the green screen: We have used Professional Quality Paint to cover the double cyclorama Green Screen in Studio3 to maxis results. Studios 3 is our purpose built green screen studio.
The air-conditioned studios are serviced by toilets and onsite parking. Please note that Studio3 is on the first floor and is access via a single flight of stairs. - Chroma key software: Use a quality chroma key software that is suited to your needs. Different software options have different capabilities, so it is important to choose one that is best suited for your project. It is also important to learn how to use the software properly to achieve the best results possible.
- Test your setup: Before you begin filming, it is important to test your setup to ensure that everything is working properly. This will save you time and frustration during post-production.
By following these tips, you can achieve high-quality results when using a green screen cyclorama. Remember to take your time and be patient, as it can take some practice to get the lighting and keying just right.
Here are some benefits of using a painted green screen over a portable green screen:
- High-quality results: Painted green screens are often considered to produce better results than portable green screens. This is because painted screens are seamless and do not have any wrinkles or folds, which can cause shadows or inconsistencies in the chroma keying process.
- Greater durability: Painted green screens are typically more durable than portable green screens, as they are often made from high-quality materials and designed to withstand regular use. They can also be easier to clean and maintain, as they do not need to be folded or stored.
- Customization: With a painted green screen, you have complete control over the size, shape, and color of the screen. This means that you can create a custom green screen that is tailored to your specific needs, which can be especially useful if you have a unique filming space or specific requirements for your chroma keying.
- Improved lighting: Because painted green screens are typically larger and more fixed in place than portable green screens, they can allow for better control over the lighting. This can help to reduce shadows, reflections, and other lighting issues that can cause problems during the chroma keying process.
- Cost savings: While a painted green screen may require a larger upfront investment than a portable green screen, over time it can be more cost-effective. This is because painted green screens typically last longer and do not need to be replaced as frequently as portable green screens.
Overall, while both painted and portable green screens have their advantages, a painted green screen may be the better option for those looking for high-quality results, durability, customization options, improved lighting, and long-term cost savings.